Recipe
Servings
2 1×
Serves 2Prep 5 minCook 10 minTotal 15 min
Nutrition per serving
Ingredients
- 2 large chicken breasts pounded to even thickness
- 1 lemon zested and juiced
- 1 tbsp avocado oil high smoke point
- 2 sprigs fresh rosemary finely chopped
- 2 cloves garlic minced
Method
- Pat the chicken with paper towels until the surface feels like parchment.
- Sear in a shimmering hot pan for 4-5 mins per side without moving until a crust forms.
- Add garlic and lemon juice in the final minute to deglaze the pan and coat the chicken.
We’ve all been there: it’s 6:30 PM, the fridge is staring back at you with judgmental silence, and the temptation to order takeout is reaching a fever pitch. But what if I told you that the most succulent, restaurant-quality chicken is only fifteen minutes away? This isn’t about magic; it’s about the science of the sear. My blog is dedicated to the idea that you don’t need hours to create something soulful. Mastering the quick sear transforms humble poultry into a bright, citrusy masterpiece that fits perfectly into the chaos of a Tuesday night.
The Physics of the Perfect Sear: Heat, Moisture, and Chicken That Actually Browns
If you’ve ever pulled chicken from a skillet and found it pale, wet, and vaguely offended by the whole experience, the issue usually comes down to heat transfer. A proper sear is not a personality trait. It is physics. The pan needs to deliver enough energy, fast enough, to dry the surface and push browning reactions into gear before the meat overcooks. That’s the whole game.
The star of the show is the Maillard reaction, which sounds like a stern French professor but is really a chain of browning reactions between amino acids and reducing sugars. In chicken, this reaction creates hundreds of flavor compounds that read as savory, roasted, nutty, and deeply chicken-y in the best possible way. It kicks in when the surface temperature climbs well above the boiling point of water. That detail matters because water is the clingy ex who refuses to leave the pan.
To achieve that golden crust, dry the chicken thoroughly. Don’t dab at it politely. Pat it dry with intent. Surface moisture must evaporate before browning begins, and evaporation steals a shocking amount of heat energy. As long as the surface is wet, the temperature stalls around 100°C/212°F. That is steaming territory, not searing territory. The pan may be blazing hot, but if the chicken is damp, you’ve basically built a tiny sauna for your dinner.
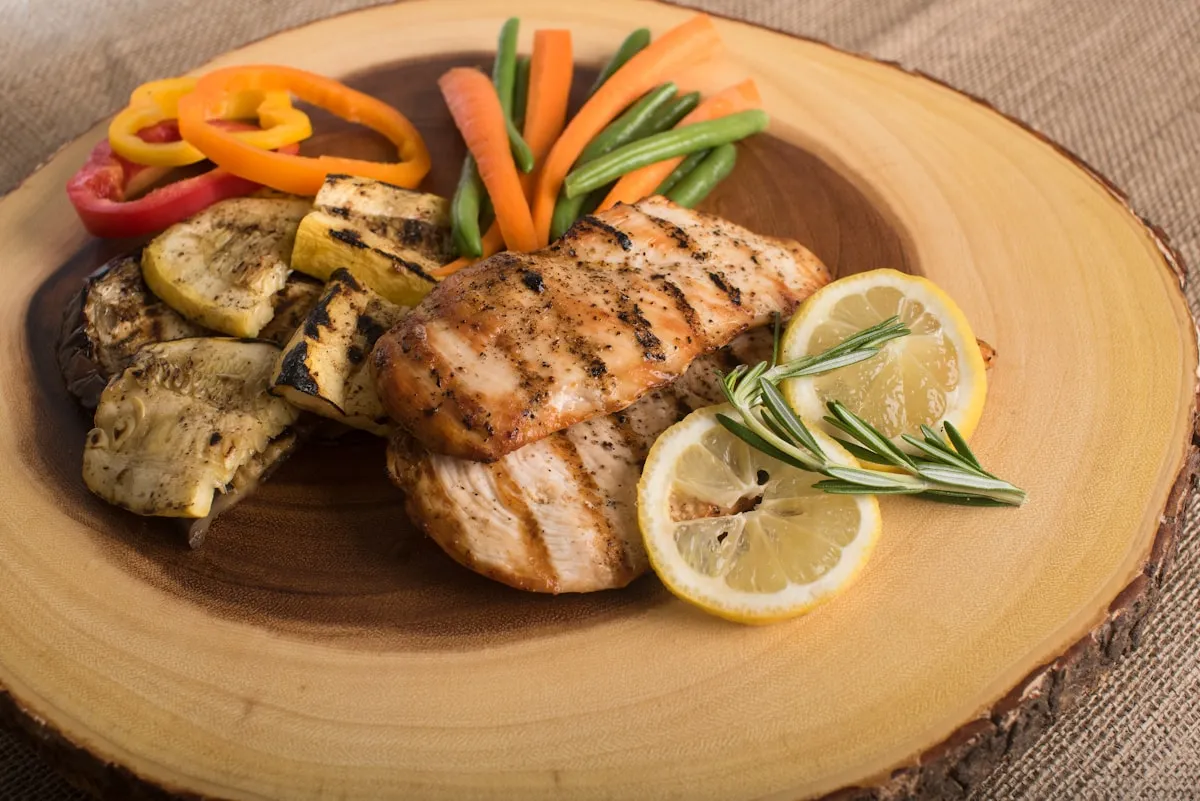
Use a heavy pan when possible. Cast iron and stainless steel both hold heat better than thin nonstick pans, which means they don’t panic and lose temperature the second cold chicken lands in them. That thermal mass is your insurance policy. Add chicken to a weak pan and the heat drops too far, too fast. Instead of browning, the meat leaks moisture, the moisture turns to steam, and the steam prevents crust formation. It’s a grim little feedback loop.
Preheat properly. Don’t throw chicken into a lukewarm skillet and hope for the best. Wait until the oil shimmers and moves quickly across the surface. That visual cue matters because oil improves contact between the uneven surface of the chicken and the flat surface of the pan. Better contact means better conduction, and conduction is the fast lane of heat transfer. Air is lazy. Metal is efficient. Let metal do the work.
Then do the hardest thing in home cooking: leave it alone. When chicken first hits the pan, proteins at the surface begin to denature and bond temporarily with the metal. After enough browning develops, the crust firms up and naturally releases. If you try to flip too early, it sticks because the structure hasn’t finished setting. Use the release test. Nudge one edge gently. If the chicken argues, wait. If it lifts easily, flip it. The pan is not being dramatic. It is giving you data.
Thickness matters too. Very thick chicken is harder to sear evenly because the outside can race toward overcooked while the center still needs time. Use pieces of similar thickness so energy moves through the meat at a predictable rate. That simple move is one of the least glamorous secrets behind quick family meals that actually feel calm instead of chaotic.
If you’re exploring air fryer recipes dinner fans swear by, the same principles still apply. Dry the surface. Preheat the machine. Avoid crowding. An air fryer uses fast-moving hot air, which boosts convective heat transfer, but it still won’t give exactly the same crust as direct pan contact. The result can still be excellent; just don’t expect the skillet version’s same deeply bronzed, edge-to-edge sear.
Herb Chemistry Without the Funeral: Keep Fresh Aromatics Bright
Lemon and herbs work because they attack richness from two different angles. Lemon brings acid, which sharpens flavor and cuts through fat. Fresh herbs bring volatile aromatic compounds, which is a fancy way of saying they smell amazing and disappear fast if you bully them with heat.
That last part is the big one. Fresh herbs contain essential oils stored in delicate plant structures. Think parsley’s grassy freshness, thyme’s woodsy perfume, rosemary’s piney punch, or basil’s sweet peppery lift. Those aromas come from compounds that evaporate easily. That’s great when the chicken hits your nose at the table. It’s less great when those same compounds vanish in a screaming-hot pan five minutes too early.
Use hardy and tender herbs differently. Rosemary and thyme can tolerate more heat because their leaves are tougher and their flavor compounds hold up better. Parsley, dill, chives, and basil are more fragile. Add them too early and they go from fresh and lively to tired and vaguely swampy. If you want bright herb flavor, stir tender herbs in near the end or scatter them over the finished chicken while it rests. That preserves more of the aromatic oils instead of sending them straight into the kitchen air as a lovely but short-lived perfume.
Acid changes herb flavor too. Lemon juice and zest don’t just add brightness; they help frame the herb notes so they taste more defined. Zest is especially useful because it contains citrus oils without the extra water that can interfere with browning. Use zest for concentrated lemon aroma during or after cooking, then use juice later for lift and balance. That order matters. Put lots of lemon juice in too early and you cool the pan, loosen the crust, and invite burning if the juices reduce too hard around the edges.
This is also why marinades need restraint. Acid and salt can improve flavor, but a very wet marinade works against a hard sear. It creates the same moisture problem we just roasted earlier. If your goal is color and crust, keep the surface of the chicken relatively dry before it hits the pan. Build the bright herb-lemon finish after the initial sear, when the crust is already safe and smug.
If you want to riff, keep the same flavor logic. Swap lemon for lime when you want sharper acidity and a greener profile. Use orange for a rounder, sweeter citrus note, especially with rosemary. Try tarragon if you want a subtle anise edge, or sage if you want something deeper and more autumnal. Just respect the heat tolerance of the herb you choose. That’s the difference between flavor layering and flavor vandalism.
For more inspiration on high-heat cooking with smart flavor timing, check out my guide on 15-minute Thai prawn noodles, where fast heat does a lot of heavy lifting without flattening the fresh ingredients.
Side Dishes That Don’t Fight the Chicken
A well-seared lemon herb chicken already brings richness, acidity, and a good hit of savory depth, so your side dishes should support that balance instead of stomping all over it. Think contrast, not competition.
For healthy dinner ideas, I like something green and sharp. A peppery arugula salad works because its bitterness and bite cut through the browned exterior of the chicken. Steamed or sautéed green beans do the same job with more snap. Asparagus is another easy win, especially if you finish it with a little lemon so the plate feels connected instead of random.
You also want something that can catch the juices. Rested chicken always leaves behind flavorful drippings, and wasting those should be illegal. Use couscous, quinoa, or a simple rice situation to soak them up. Those starches calm the brightness of the lemon and make the meal feel complete without making it heavy.
If you want a richer side, keep the portions sensible and let acidity do some cleanup. A light pasta, a spoonful of buttery potatoes, or a creamy bean mash can all work if the rest of the plate stays fresh. That balance is what turns browned chicken into one of those quick family meals you’ll actually want to repeat. If you want another easy side idea, peek at the starch emulsion secrets behind a simple pasta that plays nicely with a bright main. You can also browse more quick meals when your weeknight brain has officially clocked out.
FAQ: Troubleshooting Your Sear
Why does my chicken always come out dry and rubbery?
Usually, you’re either overcooking it or accidentally steaming it first. If the pan isn’t hot enough, the chicken sits there leaking moisture while the exterior slowly toughens. Then the center overshoots the finish line while you’re still waiting for color. Use high heat, dry the surface well, and let the chicken rest before slicing so the juices can redistribute instead of sprinting onto the cutting board.
What if my chicken sticks to the pan like it pays rent there?
That usually means you tried to move it before the crust formed. Early in cooking, the surface proteins bond to the metal. As browning develops, that bond loosens and the chicken releases naturally. Don’t force it. Check gently, and if it resists, give it another minute. Sticking is often a timing problem, not a pan problem.
Can I use frozen chicken for a quick sear?
Technically yes, but this is one of those “just because you can doesn’t mean you should” situations. Frozen chicken dumps water into the pan as it thaws, and water is the sworn enemy of Maillard browning. Thaw it fully first, then dry it aggressively. If the surface feels damp, you’re still not ready.
Why did my herbs turn dark and taste flat instead of fresh?
You probably added delicate herbs too early. Fresh herb flavor comes from volatile aromatic oils, and high heat drives those compounds off fast. Hardy herbs like rosemary and thyme can take more punishment. Tender herbs like parsley, basil, dill, and chives need gentler treatment. Add them near the end or after cooking if you want bright, fresh flavor instead of green confetti with regrets.
Is it possible to do this as one of those air fryer recipes dinner people love?
Absolutely. The air fryer gives you strong convective heat, which can brown chicken nicely if you preheat it and avoid crowding. Dry the chicken well and use a light coat of oil to help heat transfer. Just know the crust will be a little different from pan-seared chicken because you’re missing the direct metal contact that creates the most dramatic browning.
What if the lemon flavor tastes harsh instead of bright?
That usually means the acid went in too early or too heavily. Lemon juice is best used toward the end or after cooking, when it can lift flavor without interfering with browning. Lemon zest is the sneaky MVP here because it gives you citrus aroma from essential oils without adding extra liquid. Use zest for perfume, juice for brightness, and don’t dump both into the pan at full blast right away.
The lemon juice made my pan sticky and burnt. What happened?
You likely added liquid to a very hot pan before the chicken had finished searing. As the liquid reduces, natural sugars and proteins can scorch, especially if there’s any sweetener involved. Build the crust first. Then add lemon and herbs later, when you actually want a quick glaze or pan sauce instead of a blackened science project.
What kind of oil should I use for high-heat cooking?
Use an oil with a high smoke point, like avocado oil, grapeseed oil, or a refined light olive oil. Save extra virgin olive oil for finishing if you like its flavor. For the sear itself, you need something that can handle real heat without smoking aggressively or turning bitter.
How do I know when to flip the chicken without a thermometer?
Use the release test. Slide tongs under one corner and lift gently. If the chicken resists, the crust isn’t ready. If it lifts easily, flip it. It’s one of the simplest useful kitchen cues around, and it saves you from tearing the surface and losing all that hard-earned browning.
What if my fresh herbs taste weak even though I used a lot?
Quantity is not always the problem. Timing and handling matter more. Chop herbs just before using them so their oils stay trapped until the last possible moment. Add a mix of hardy herbs during cooking and tender herbs at the end. Pair them with lemon zest or a touch of fat so the aromatic compounds spread better across the chicken and hit your nose as strongly as your tongue.