Recipe
Servings
Servings 1×
Ingredients
- Chicken
- Avocado
- Garlic
- Lemon
- Butter
- Cooking oil
Method
- Use a meat mallet or even the bottom of a heavy jar to pound the breast to an even half-inch thickness.
- Pat the meat bone-dry with paper towels.
- Heat the pan until the oil shimmers and dances.
- Give it five minutes to let those juices redistribute into the fibers.
- Combine smoked paprika, garlic powder, and a touch of cumin.
There is something deeply soulful about the sound of a hot pan meeting a well-seasoned piece of protein. In the rush of a Tuesday evening, you don’t need a three-hour braise to find comfort. You just need a technique that works. My favorite way to reclaim my evening is with a pan-seared chicken breast that actually stays juicy. We’ve all been victims of the "rubber chicken" dinner, but I’m here to tell you that 15 minutes is all it takes to turn a boring staple into the highlight of your quick family meals.
The Science of the Sear: Why Your Chicken Deserves Better
The secret to a soulful dinner isn't a long list of ingredients; it's understanding what happens in that skillet. Most home cooks treat chicken breast like a chore, but it’s actually a blank canvas waiting for the Maillard reaction. This is the chemical dance between amino acids and reducing sugars that creates that golden-brown crust we all crave. Without that crust, you’re basically just eating steamed cardboard.
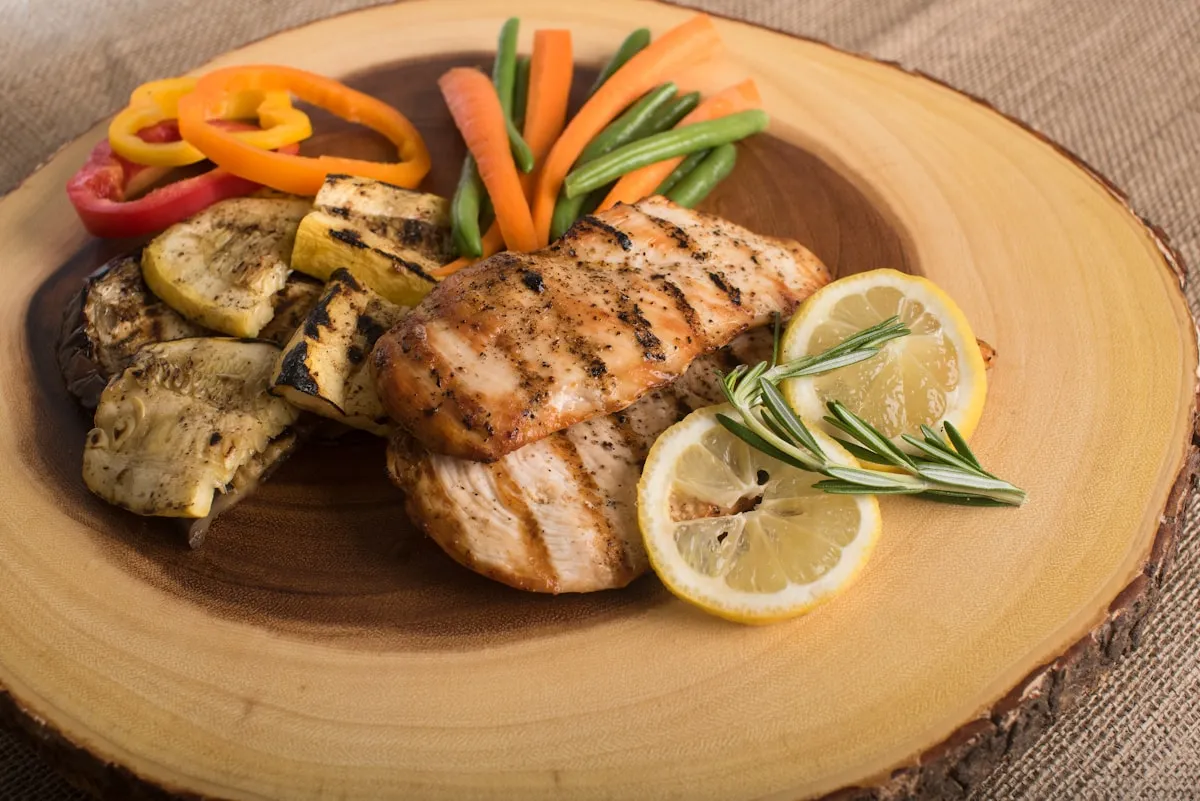
First, address the geometry of your meat. Chicken breasts are naturally uneven, thick at one end and tapered at the other. If you throw them in the pan as-is, the thin end will turn into leather before the thick end is even safe to eat. Use a meat mallet or even the bottom of a heavy jar to pound the breast to an even half-inch thickness. This mechanical tenderization breaks down tough muscle fibers and ensures every square inch hits the pan at the same time.
Next, focus on moisture, specifically, the lack of it. Moisture is the enemy of the sear. If your chicken is wet when it hits the oil, the heat goes into boiling that water instead of browning the meat. You end up with grey, sad chicken. Pat the meat bone-dry with paper towels. I mean really dry. If you have a few extra minutes, let it sit uncovered in the fridge for ten minutes after seasoning. This creates a tacky surface that forms a superior crust.
When it’s time to cook, use a high-smoke-point oil like avocado or grapeseed. Avoid butter at the start; its milk solids will burn before your chicken is done. Heat the pan until the oil shimmers and dances. When you lay the chicken down, leave it alone. Do not poke it. Do not move it. That "sticking" feeling is the meat telling you the crust hasn't formed yet. Once the Maillard reaction completes, the chicken will naturally release from the pan. This is one of those healthy dinner ideas that relies on patience rather than complexity.
Finally, use a thermometer. The USDA says 165°F, but if you pull the chicken at 165°F, it will carry over to 170°F and become dry. Pull that bird at 155°F to 158°F. The residual heat, the "carryover cooking", will bring it up to a safe 165°F while it rests. Resting is non-negotiable. If you cut it immediately, the juices, which are currently under pressure, will flee across your cutting board. Give it five minutes to let those juices redistribute into the fibers.
Flavor Variations for High-Impact Dinners
Once you master the sear, you can pivot the flavor profile in seconds. Minimalism doesn't mean boring; it means choosing ingredients that work twice as hard. For a Mediterranean vibe, use a heavy hand with dried oregano and lemon zest in your dry rub. The lemon oils will infuse into the crust as it sears, providing a bright contrast to the rich, browned meat.
If you’re craving something deeper, try a "smoky soul" rub. Combine smoked paprika, garlic powder, and a touch of cumin. This creates a darker, more robust crust that mimics the flavor of a charcoal grill without the hassle. This is a great alternative to air fryer recipes dinner when you want that classic stovetop char.
Another technique to try is "velveting," a trick often used in professional kitchens. Lightly coat your dry-pounded chicken in a tiny bit of cornstarch before searing. This creates a microscopic barrier that protects the meat from the direct heat of the pan, resulting in a texture that is incredibly silky and tender. It’s a game-changer for anyone who struggles with overcooked poultry.
Side Dish Pairings: The Power of Acidity
A perfectly seared chicken breast is rich and savory, so your side dishes need to provide balance. Think of your plate like a scale. On one side, you have the salty, umami-heavy chicken. On the other, you need acidity and crunch to cut through that richness.
A quick arugula salad with a sharp lemon vinaigrette is my go-to. The peppery bite of the greens and the citrus acid reset your palate after every bite of chicken. If you want something warmer, try quick-pickled red onions over charred broccolini. The vinegar in the onions provides a necessary "zing" that keeps the meal feeling light and vibrant.
Avoid heavy, cream-based sides unless you’re intentionally going for a "comfort-load" meal. Instead, reach for grains like quinoa or farro tossed with fresh parsley and a splash of apple cider vinegar. These quick family meals thrive on the contrast between the hot, crispy chicken and the cool, bright sides.
Frequently Asked Questions
Why is my chicken still dry even when I don't overcook it?
Dryness isn't just about temperature; it’s about preparation. If you didn’t pound the chicken to an even thickness, parts of it were likely sitting at 180°F while you waited for the center to reach 165°F. Also, check your salt timing. Salting immediately before cooking is good, but salting 15 minutes ahead (a "dry brine") allows the salt to dissolve some of the muscle proteins, which helps the meat hold onto its water during the heat of the sear.
Can I use frozen chicken breasts for this?
Technically yes, but practically no, not for a 15-minute soulful sear. Frozen chicken releases a massive amount of water as it thaws in the pan, which kills your sear and effectively boils the meat. If you must use frozen, thaw it completely in a bowl of cold water (in its packaging) and pat it exceptionally dry before it touches the skillet. For the best healthy dinner ideas, fresh is always the winner.
My chicken keeps sticking to the pan. What am I doing wrong?
Sticking usually happens for two reasons: the pan wasn't hot enough, or you’re trying to flip it too early. When the cold meat hits the hot oil, it forms a temporary bond with the metal. As the proteins brown and the crust forms, that bond naturally breaks. If it’s sticking, give it another 60 seconds. Also, ensure you’re using enough oil to coat the bottom of the pan; you’re searing, not dry-roasting.
Is it really safe to pull chicken at 155°F?
Yes, provided you let it rest. Food safety is a function of both temperature and time. While 165°F kills bacteria instantly, holding chicken at 155°F for just under a minute achieves the same level of pasteurization. By the time your chicken has rested for five minutes, the internal temperature has stayed well above the safety threshold long enough to be perfectly safe. This is the secret to why restaurant chicken is so much juicier than what you usually get at home.
Should I use a lid while searing?
Generally, no. A lid traps steam, and steam is the enemy of a crispy crust. If you find your chicken is getting too dark on the outside before the inside is done (which usually means your heat is too high), you can briefly use a lid for the last 2 minutes, but you’ll sacrifice some of that soulful crunch. Better to just lower the heat slightly and keep the lid off.
{“@type”:”Article”,”image”:”https://cdn.marblism.com/ghNDF3GE_vL.webp”,”author”:{“name”:”Penny”,”@type”:”Person”},”@context”:”https://schema.org”,”headline”:”Soulful 15-Minute Pan-Seared Chicken Breast”,”publisher”:{“logo”:{“url”:”https://cookpedia.com/logo.png”,”@type”:”ImageObject”},”name”:”Cookpedia”,”@type”:”Organization”},”description”:”Learn the science and technique behind the perfect 15-minute pan-seared chicken breast. Achieve a golden crust and juicy interior every time with these expert tips.”,”datePublished”:”2026-06-15″}
{“@type”:”FAQPage”,”@context”:”https://schema.org”,”mainEntity”:[{“name”:”Why is my chicken still dry even when I don’t overcook it?”,”@type”:”Question”,”acceptedAnswer”:{“text”:”Dryness is often caused by uneven thickness or improper salt timing. Pounding the chicken to an even 1/2-inch thickness ensures uniform cooking. Salting 15 minutes before cooking also helps proteins retain moisture.”,”@type”:”Answer”}},{“name”:”Can I use frozen chicken breasts for this?”,”@type”:”Question”,”acceptedAnswer”:{“text”:”For a proper sear, fresh is best. Frozen chicken releases too much moisture in the pan. If using frozen, thaw completely and pat extremely dry before searing.”,”@type”:”Answer”}},{“name”:”My chicken keeps sticking to the pan. What am I doing wrong?”,”@type”:”Question”,”acceptedAnswer”:{“text”:”Sticking occurs if the pan isn’t hot enough or if you flip too early. Wait for the Maillard reaction to complete; the chicken will naturally release once a crust has formed.”,”@type”:”Answer”}},{“name”:”Is it really safe to pull chicken at 155°F?”,”@type”:”Question”,”acceptedAnswer”:{“text”:”Yes, if you allow it to rest. Holding chicken at 155°F for about 60 seconds achieves the same safety level as 165°F instantly. Carryover cooking during the rest period will finish the process.”,”@type”:”Answer”}}]}